

Purpose
Assign each person a role that sets what they can do, create a custom role if the three system roles don’t fit, and limit which records each person sees. Day-to-day user management lives in How to Manage Users and Roles.Steps
1
Review the three system roles
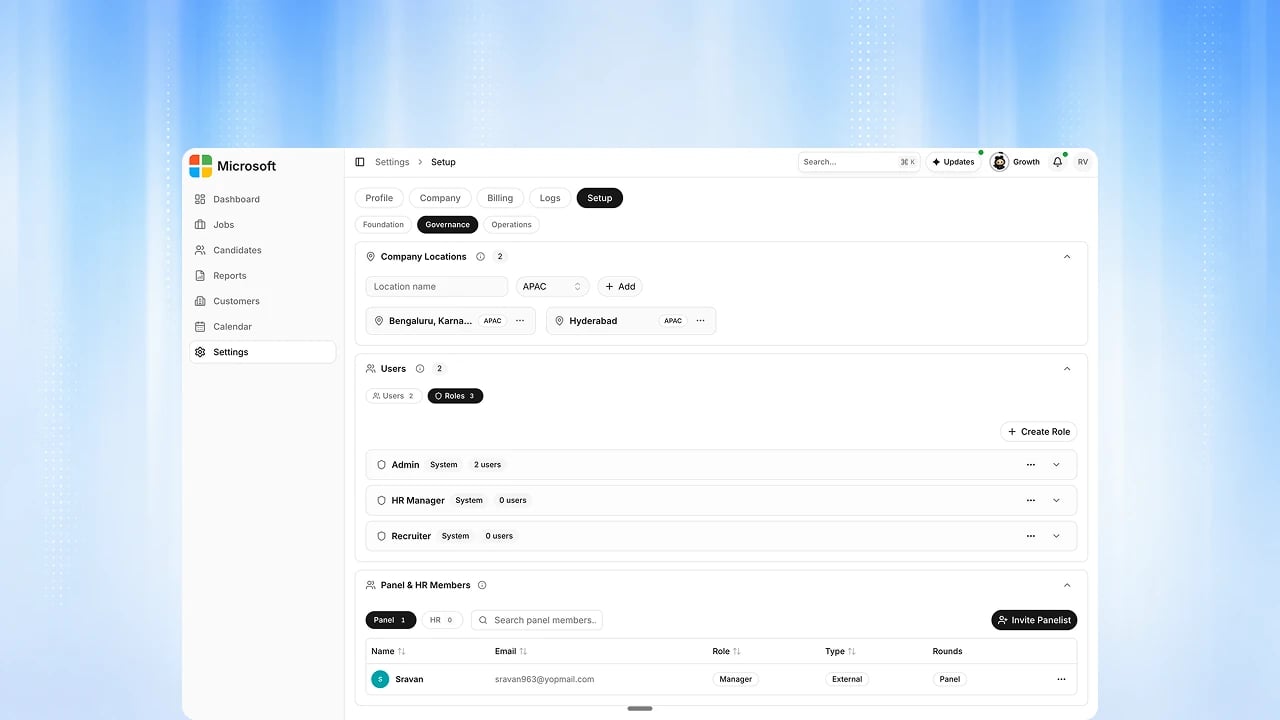
Go to Settings → Setup → Governance and open Roles in the Users
section. Understand the system roles: Admin, HR Manager, and Recruiter. Each is
permission-locked and can’t be deleted.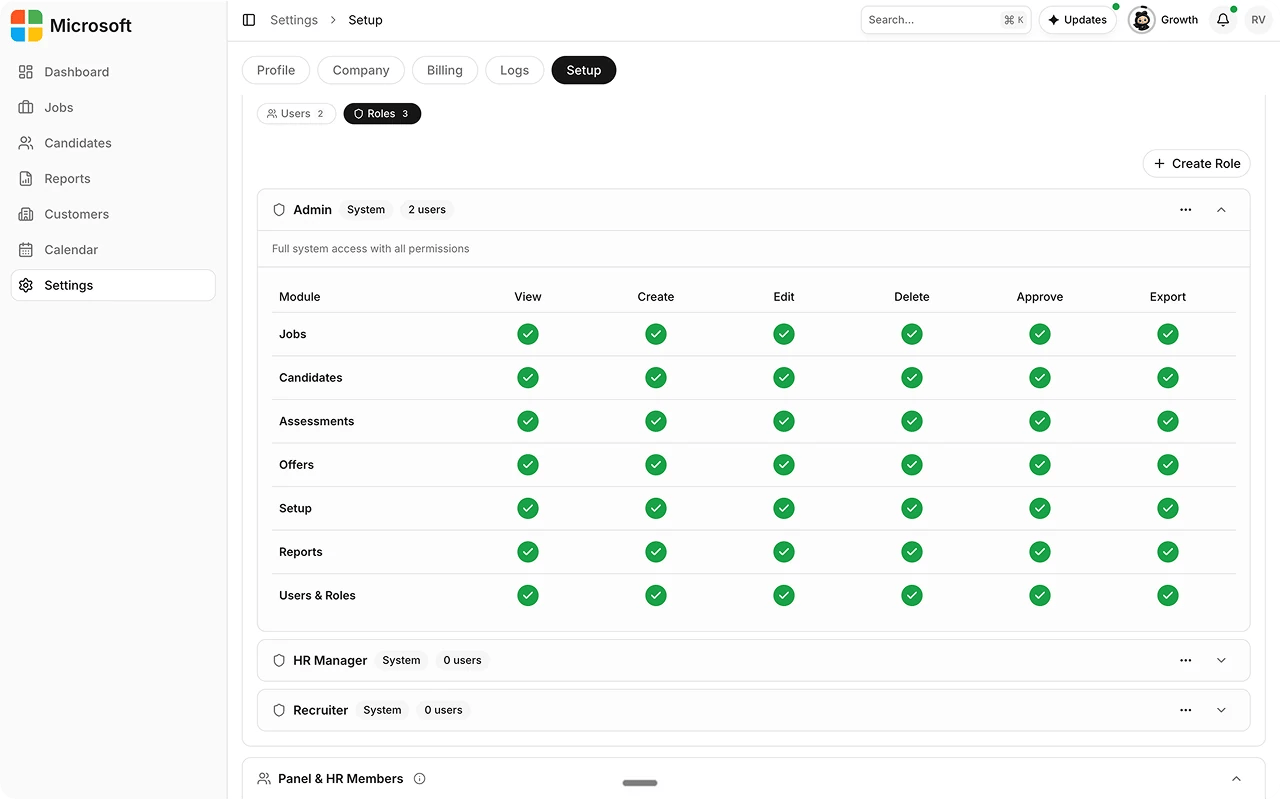
2
Open a role's permission matrix
See exactly what a role can View, Create, Edit, Delete, Approve, or
Export across Jobs, Candidates, Assessments, Offers, Setup, Reports, and
Users & Roles. The Recruiter role has no access to Setup. Its tab is
hidden from the navigation and blocked server-side, regardless of the
permission matrix.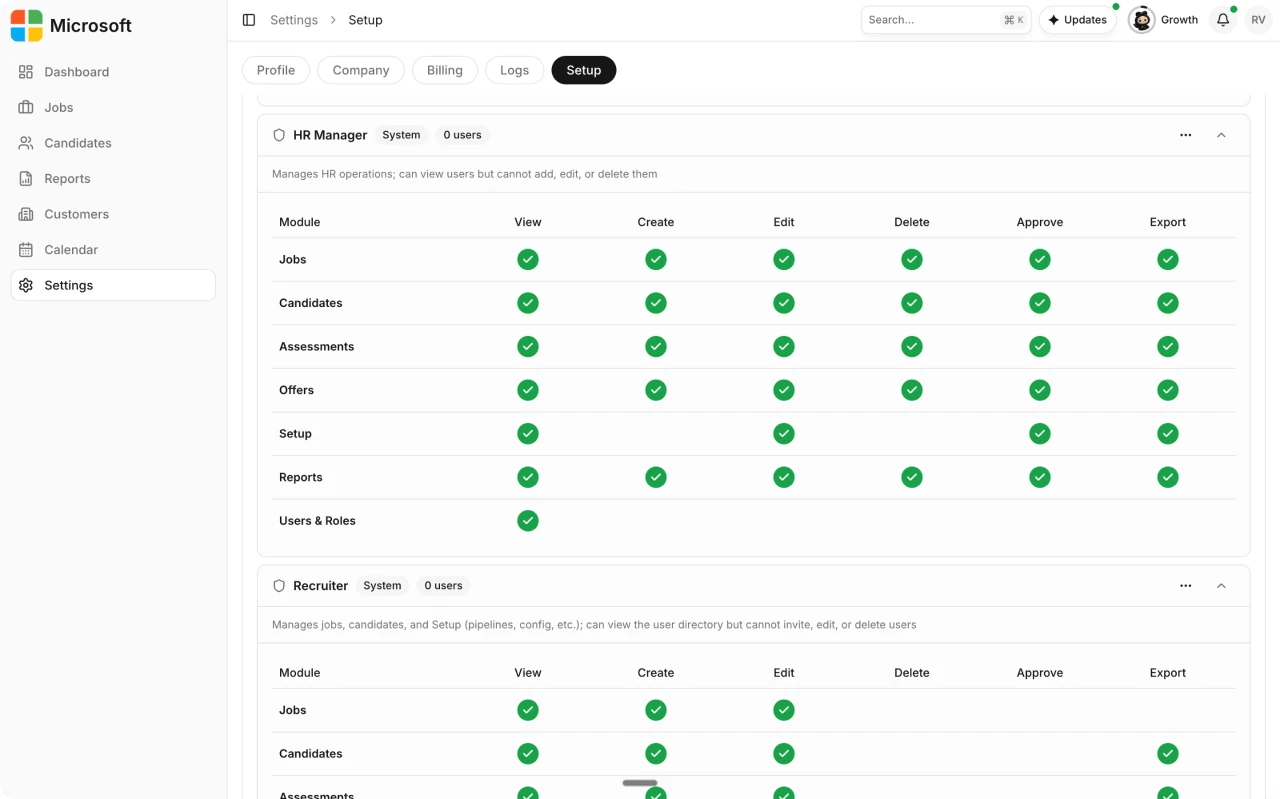
3
Create a custom role
If the three system roles don’t fit, create a role with its own name,
description, and permission matrix.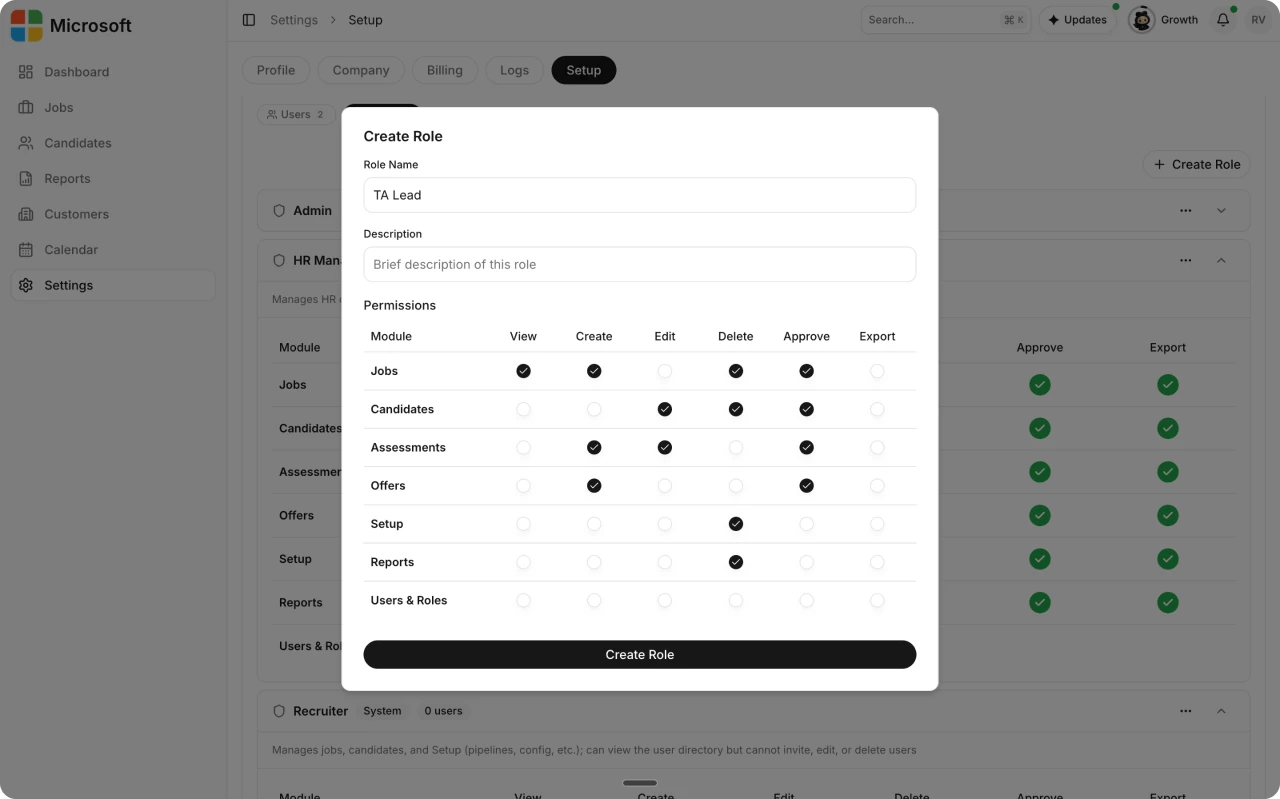
4
Assign a role per person
Give each person the role that fits their responsibilities when you
invite them. See How to Add Users.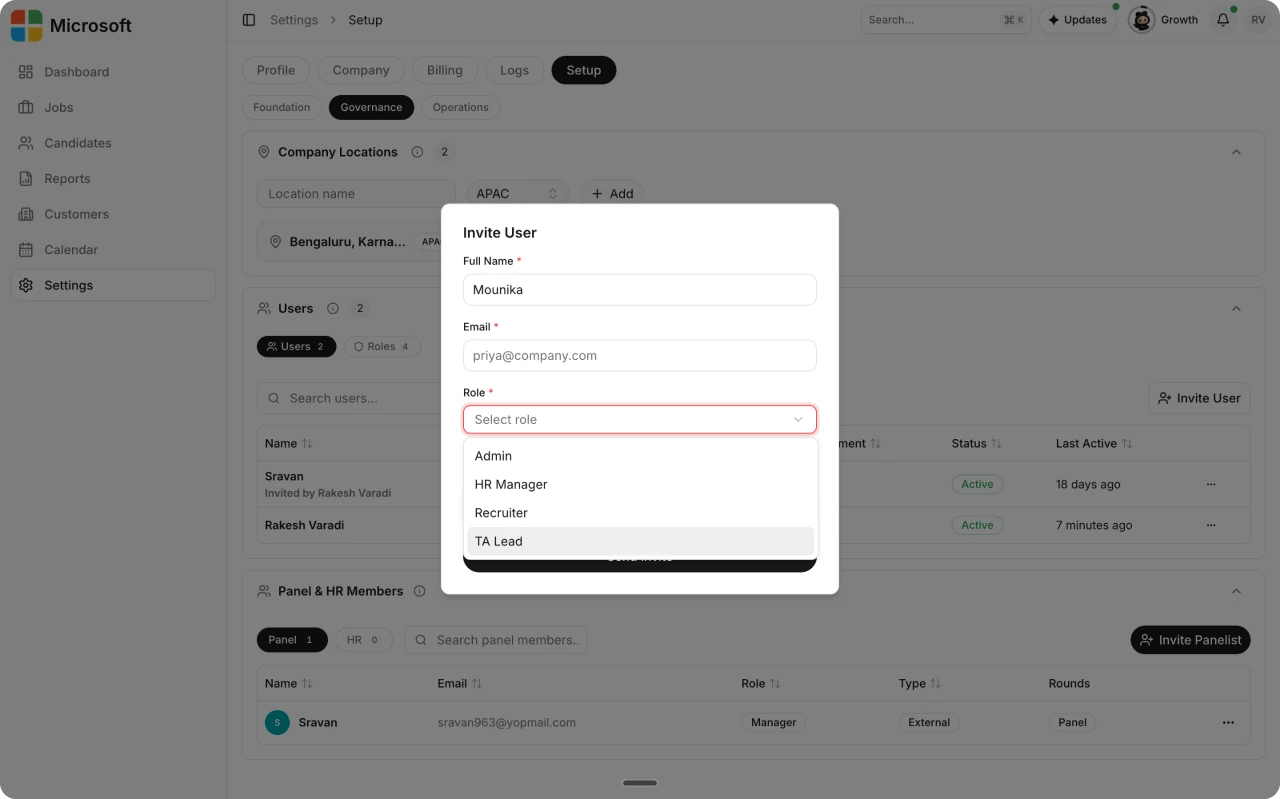
5
Set data visibility per person
Data visibility is the second access axis. It works alongside the role:
the role decides the actions, visibility decides the records those
actions apply to. Choose All company data, Their department only
(plus anything they created or are assigned to), or Only their own
records (jobs they created or are assigned to, and those candidates).
Set it at invite time or later with Change data visibility on the
person’s row.